Open the Gmail app on your device.
- Click on your account in the upper, right corner of the interface. From the drop down, select Add another account. You should be presented with this screen:Select Exchange and Office 365.

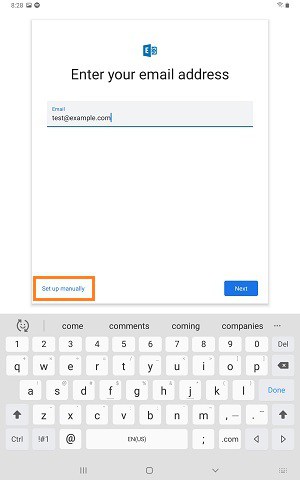
- Enter your email address and click on Set up manually at the bottom of the Gmail interface. This will allow you to enter your server information to connect directly
3. You'll next be presented with a screen that asks you to input the following:
- Email Address - This is your full email address.
- Server - This is your mail server address. For example, mail.example.com. Generally, it will match the URL you go to for logging into webmail.
- Domain\Username - This is the domain portion of your server then your username. For example, if your email address is test@example.com you'd enter example.com\test.
- Password - This is your account password.
- Description - If asked, this is a friendly name for the account as it will be listed within the app. You can use whatever you like to describe this account: Work, School, your business name, etc.
- Click Next
4. You may be prompted that Gmail needs access to your phone… review and activate the permissions.
5. And that's it -- the account is now set up in Gmail.